I had in mind to crochet a bikini top without cutting off my yarn or joining in yarn for the straps. I sometimes hate to sew in so many ends on my crochet projects so I came up with an idea for the one I’m currently working on.
This project is great for those of you who are just starting to make cups for your crochet summer tops. It’s an easy and simple design and very quick to make as well.
You’ll basically make two of your cup, attach the straps, connect the two pieces together and you’re done!
Pattern Use: You are welcome to sell your finished items made by this design but please do not use my photos nor share screenshots of this written pattern. I kindly ask you to link back to this website if you wish to share this pattern.
Finished Size: Small (30c, 36a, 34b, 32c, 30d).
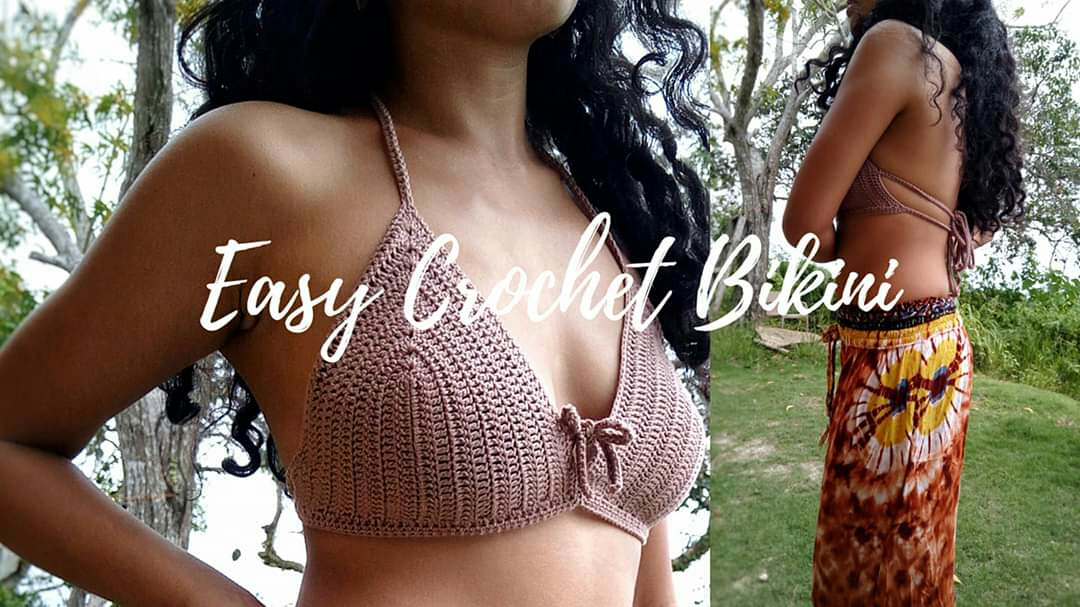
For visual learners, you can also check out the video tutorial of this bikini on my Youtube Channel here.
Get the complete written pattern with step by step pictures and instructions for sizes XXS up to XL in ready to download PDF format in my Etsy Shop here and in my Ravelry Store here.
If you make one, tag me on Facebook or Instagram so I can share work!
Muy Caliente Bikini Top
Skill level: Advanced Beginner
Crochet Terminology: Standard US Crochet Terms
Gauge: 13 sts x 6 rows = 2″ x 2″ (5 cm x 5 cm) in Double Crochets
Materials:
- #1 Fingering weight yarn (I used Cotton 8 by Scheepjes). For the size I’m making, you will not use more than 1 skein.
- Size C (3.0 mm) crochet hook
- Scissors & yarn needle
Abbreviations: ch = chain, dc = double crochet, st (s) = stitch (es), ch sp = chain space, hdc = half double crochet, sc = single crochet
Important notes before starting your project:
- All turning ch 3s counts as a stitch.
- Pattern enclosed in brackets { } are worked in the same stitch.
- Beginning ch 2s in the border does not count as a stitch.
Cup
Row 1: Ch 23, dc on the 4th ch from hook and in each ch across and add {2 dc, ch 1, 3 dc} in the last ch, dc in each st across, ch 3, turn. (46 dc and 1 ch 1 sp)
Row 2: Dc in every st across up to the center ch 1 sp, {2 dc, ch 1, 2 dc} into the center ch 1 sp, dc in each st across, ch3, turn. (50 dc and 1 ch 1 sp)
Row 3: Repeat Row 2 (8 times) or as many times until the cup sits perfectly in your breast, adding 4 stitches plus a center ch 1 sp in every row. If you prefer to have less or more coverage, add or subtract rows before working on your border.
Border (Work along the bottom of the cup)
Row 1: Ch 2, 2 hdc in each of the rows across, Ch 2, turn.
Row 2: Hdc in each of the sts across until the end of row, do not fasten.
Side Straps (Note: You may adjust the length of your straps as desired by adding or subtracting chains).
Ch 202, hdc in the 3rd ch from hook and in each chain across, sc into the 1st hdc row, sc in every dc for about 2 inches, ch 202, hdc in the 3rd ch from hook and in each chain across, sk 1 dc, sc in the next st and in each st across up to the center ch 1 sp,
Neck Straps
ch 202, hdc in the 3rd ch from hook and in each chain across, sk the center ch 1 sp, sc into the next st and in every st across leaving about 2 inches unworked,
Front Ties
ch 32, hdc in the 3rd ch from hook and in each ch across, sk 1 st, sc in the next st, sc in each st across up to the end of row, fasten. Leave enough yarn (about 2 to 6 inches) for joining the two cups together.
Repeat from the beginning to create the second cup.

Seaming
With a yarn needle, seam the two pieces in the middle starting from the bottom going up. Do not sew all the way to the front ties. Leave about half of the stitches unworked and fasten off.
Have fun and enjoy your finished Muy Caliente Bikini Top!

Hey there! This is my first comment here so I just wanted to give a quick shout out and tell you I really enjoy reading through your posts. Can you recommend any other blogs/websites/forums that deal with the same subjects? Thanks!
LikeLike